Through a bit of trial and error, I was able to generate an object file:
1
| |
Checking the disassembly of this file with objdump -d hello.o showed
promise:
1 2 3 4 5 6 7 8 9 10 11 12 13 14 15 16 17 | |
I then used an existing installation of GCC with AVR support to finish linking the code together:
1
| |
Taking a look at the disassembly of this code shows a lot of things that were not present in the original object file:
- The interrupt vector table is established. This occupies about the first 25 instructions. Each instruction is a jump to the appropriate interrupt handler. Most importantly, table index 0 is the reset “interrupt” which controls where the processor should jump to when it is initialized.
- The EEPROM Control Register and GPIOR0 are initialized and external
interrupts are disabled. Then
mainis called. - After
mainreturns, interrupts are disabled and the chip goes into an infinite loop.
Getting code on board
Now that we have a compiled binary, we need to get it onto the Arduino
proper. avrdude is an in-system programmer that will allow us to
upload the compiled code, but it prefers input in a different format:
Intel HEX. We can convert using avr-objcopy:
1
| |
Now we can upload to the Arduino:
1
| |
The Arduino Uno has a second Atmel chip (ATmega16U2) that looks like a
USB-to-serial device to the host computer. On my OS X computer, that
device shows up at /dev/cu.usbmodem1411. Your location will differ.
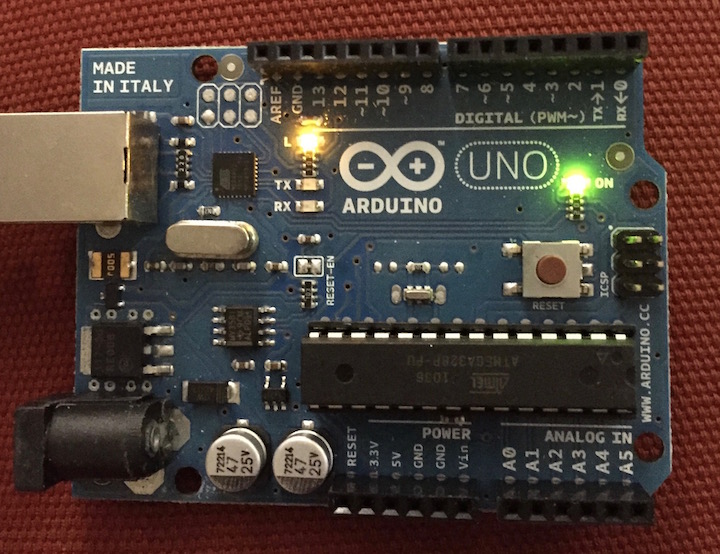
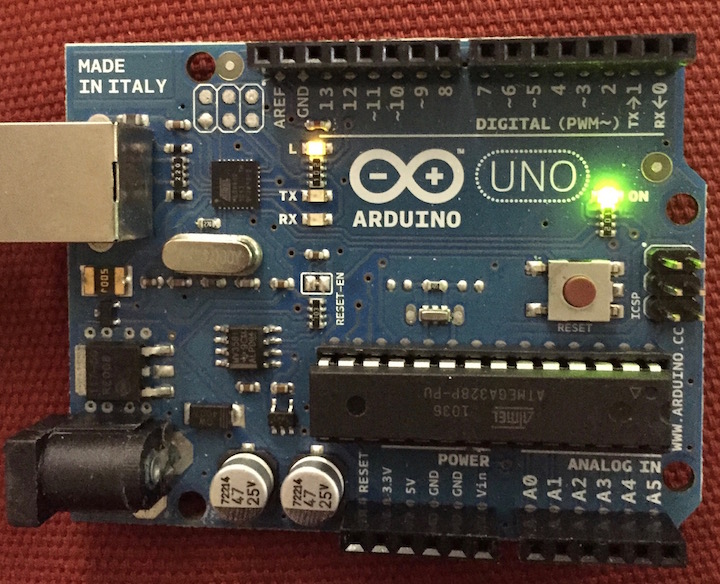
It’s alive!
Because I have such a basic level of code, I can’t do anything nice like blink an LED. Instead, I can write a tight loop that just turns the LED on or off some percentage of the time. This allows it to have a different relative brightness, which in turn lets me see that the code changes are actually happening.
Check out the LED marked L in the following pictures.
LED on 100% of the time
LED on 50% of the time
LED on 1% of the time

What’s next?
This isn’t the most elegant of solutions, and there are a lot of avenues to explore:
Avoid installing
avr-gccandavr-objcopy. Right now,avr-gccis used when compiling Rust itself (forcompiler-rt) and to finish assembly of the executable. It would be ideal if all of this could be handled within an AVR-enabled Rust or LLVM.Set interrupt handlers. I think the typical solution is to use a linker script, but that’s one more moving piece I’d like to avoid adding.
Compile
libcore! In order to get the most basic of things to compile, I had to straight-up copy code fromlibcore. An impressive amount of things are included there. Things you might want to use, like addition, not to mentionOptionor anything having to do with iterators.libstdis unlikely to ever be supported as it relies on memory allocation.Merge the Rust fork of LLVM with the AVR fork of LLVM. The more frequently these are merged, the easier it will be to eventually include the AVR support in Rust proper. I started to do this, but had a large number of merge conflicts so I backed off.
Compile AVR-enabled Rust in non-debug mode. For some reason, when I compile Rust without debugging symbols, I get an “exciting” assertion failure from deep within LLVM. That is most likely a symptom of some problem that should be fixed.
TL;DR
Check out my repo for an example that worked for me. In short:
1 2 3 4 5 6 7 8 | |
If you are on OS X, you can install the things you need (except an AVR-enabled Rust build) with homebrew:
1 2 3 | |
Continue on to part 3.
]]>